


CGI Pre-Curving
StratcoSKU: CGI-Pre-Curving
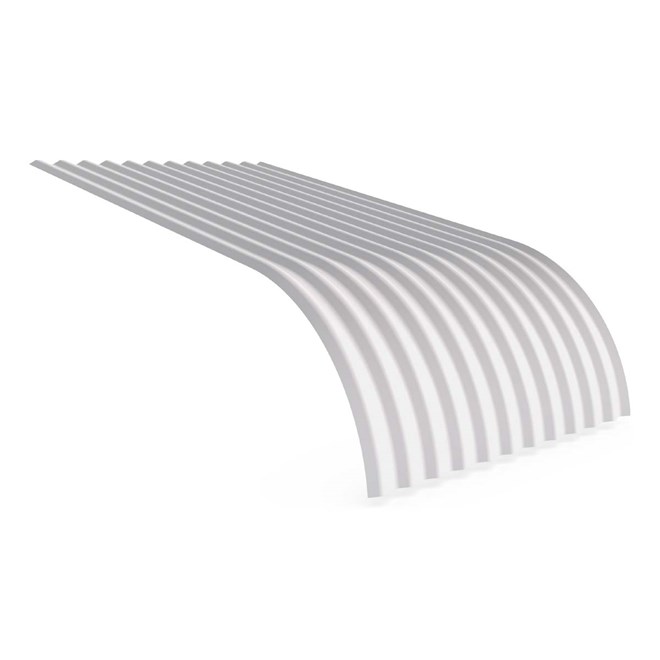
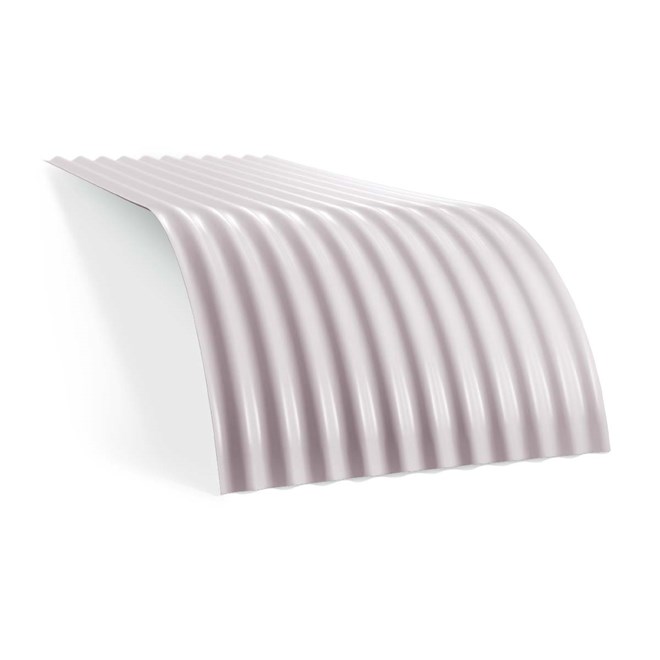
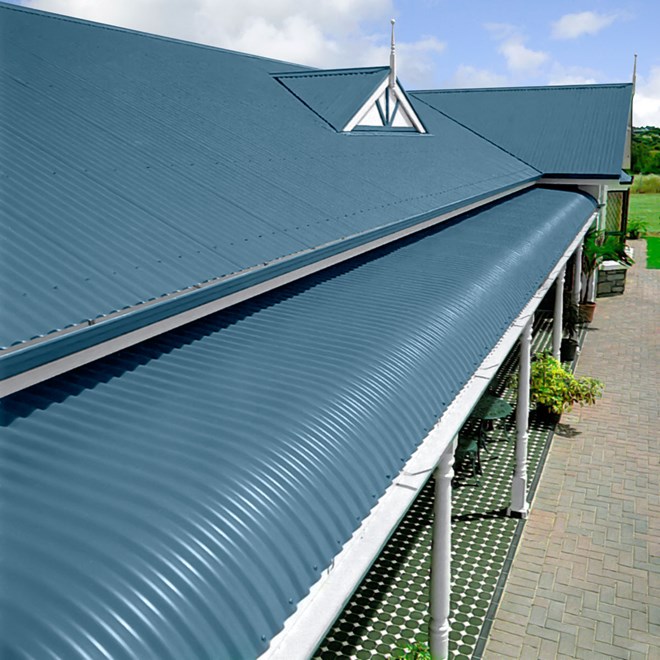
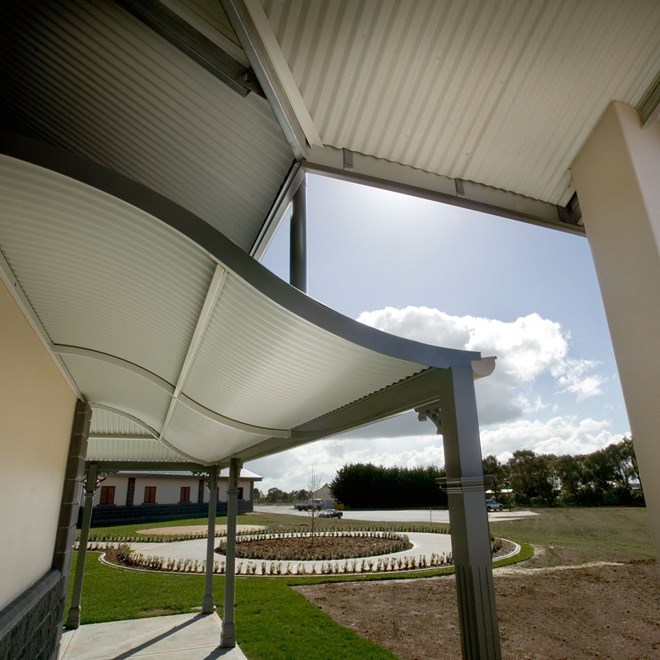
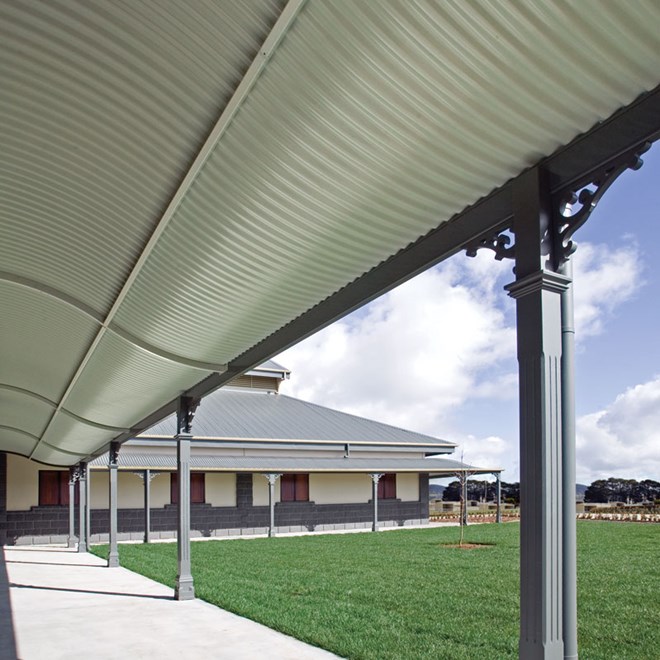
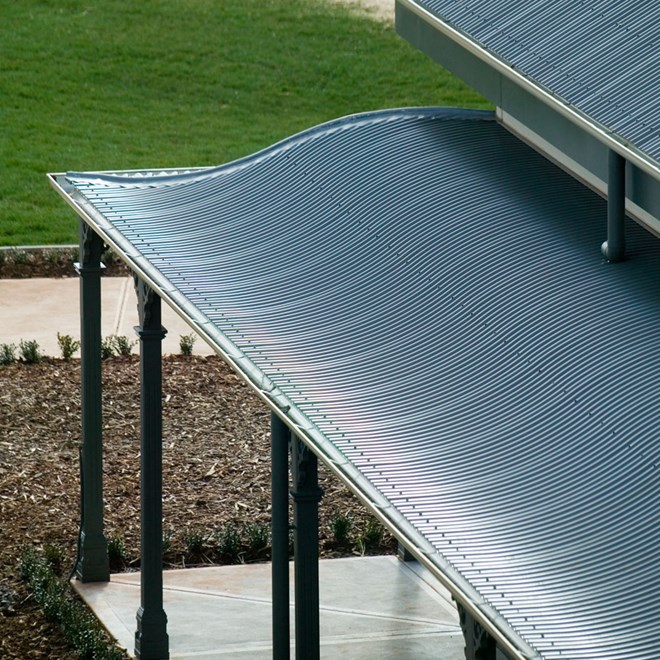
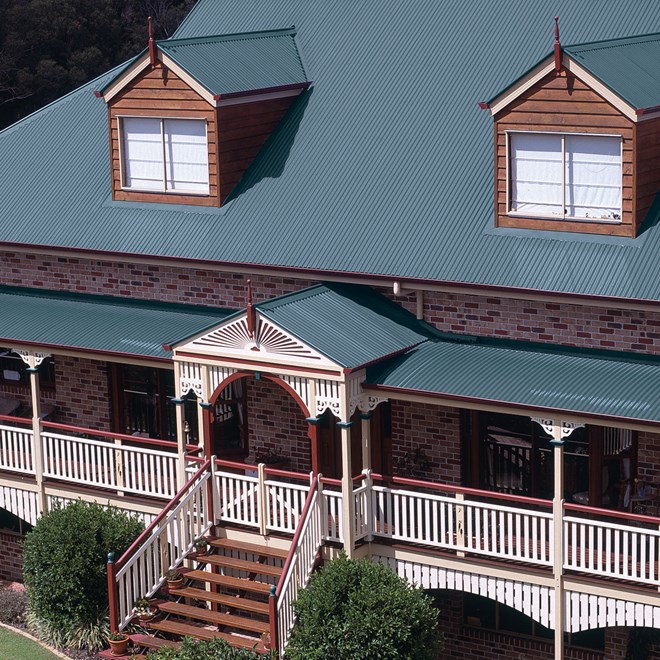
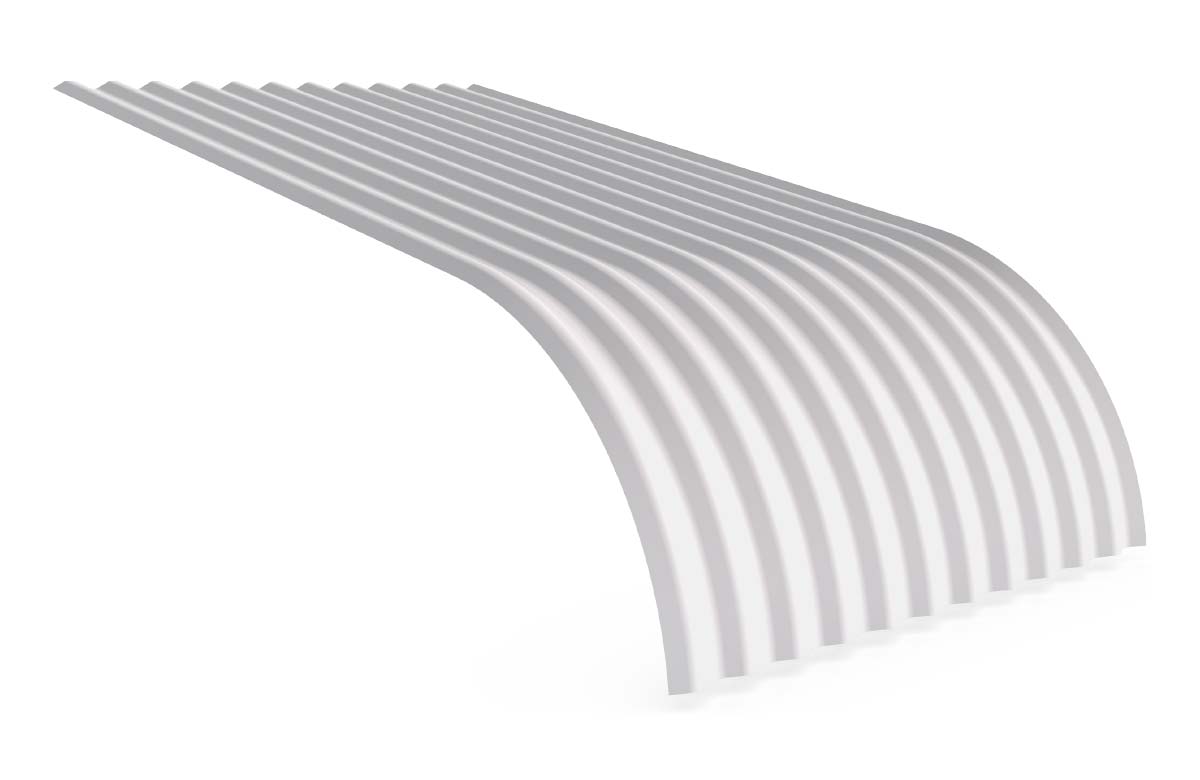
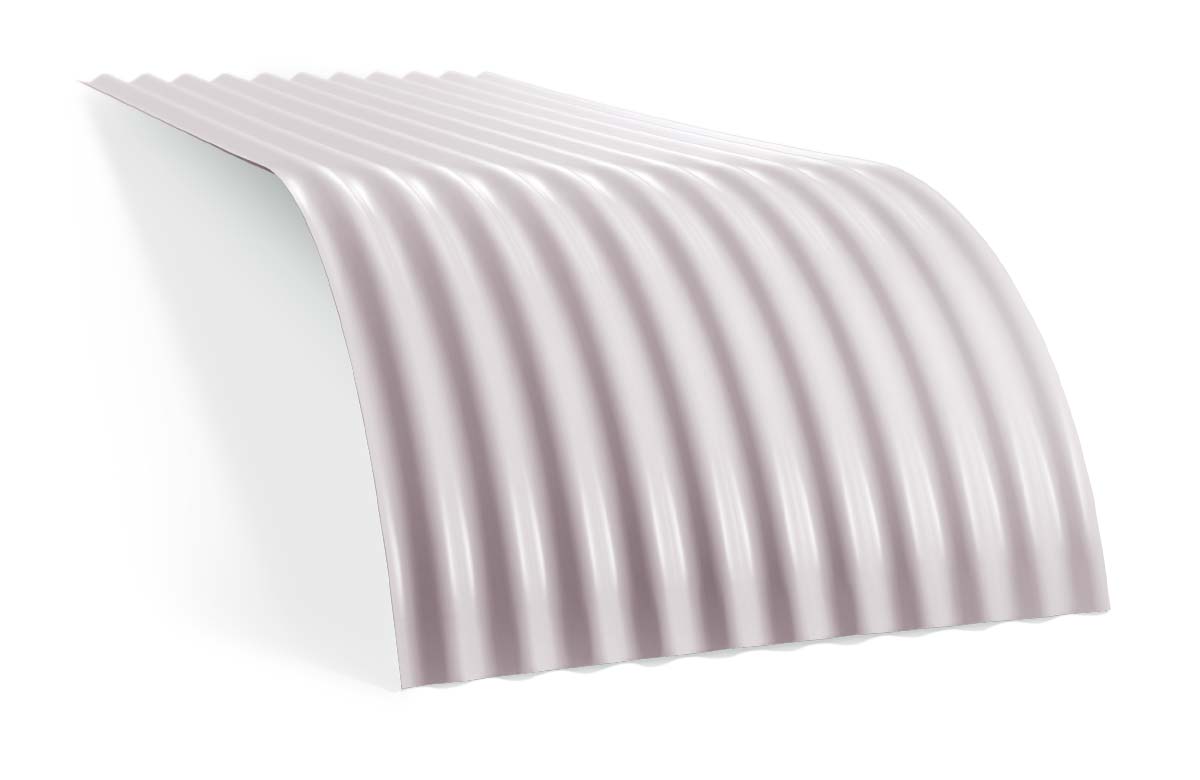
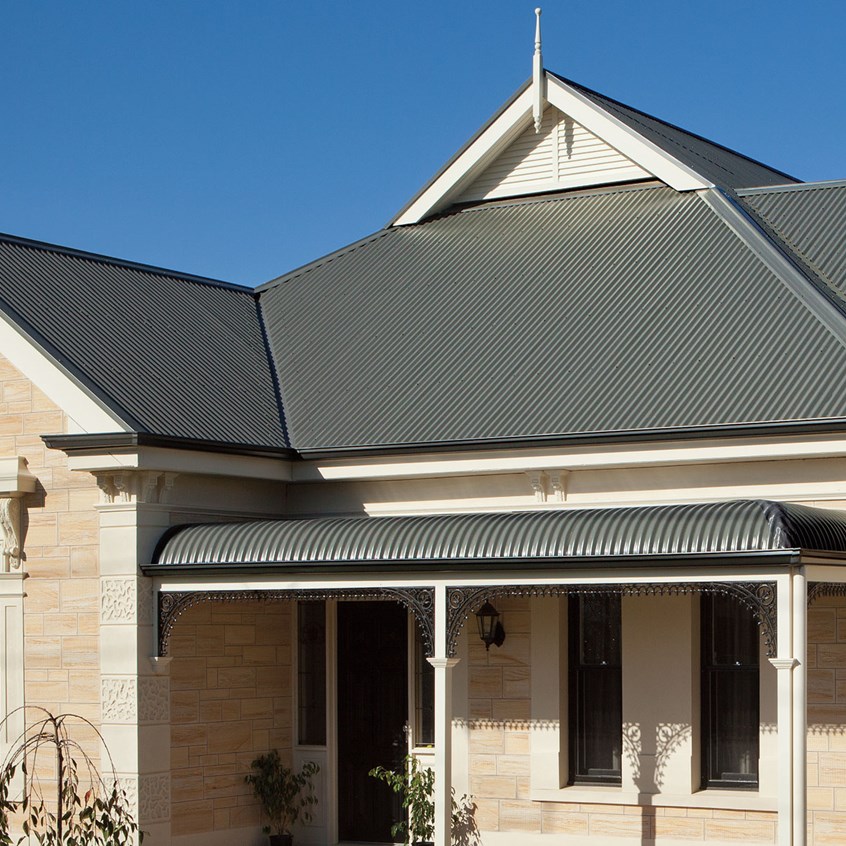
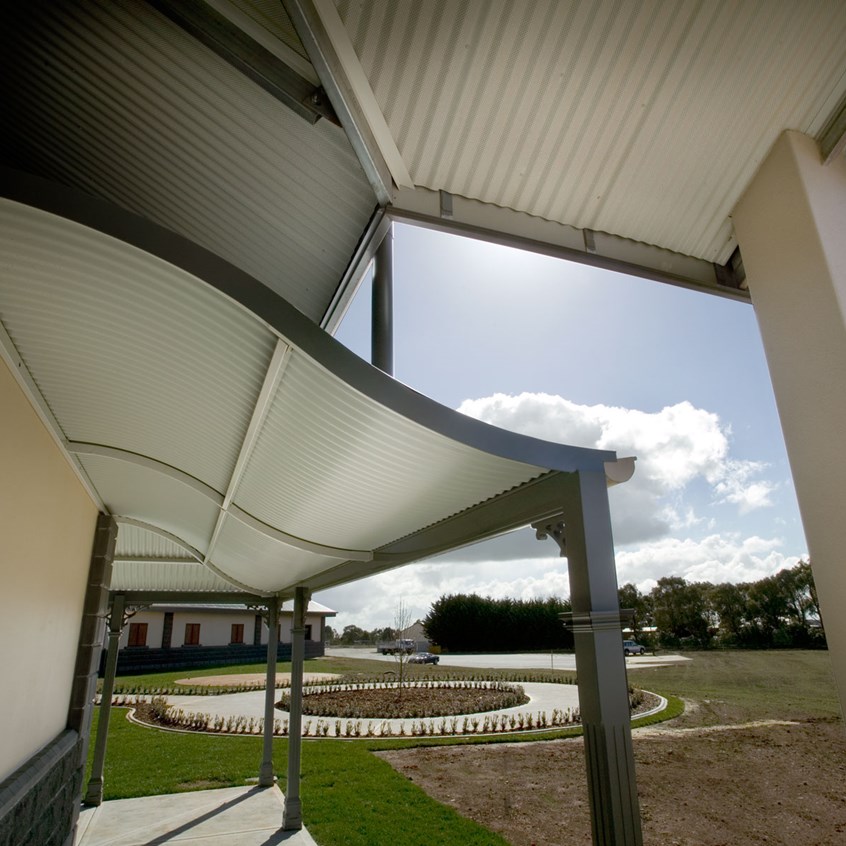
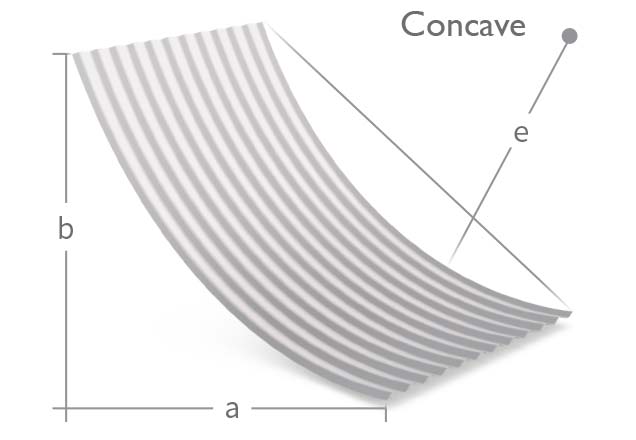
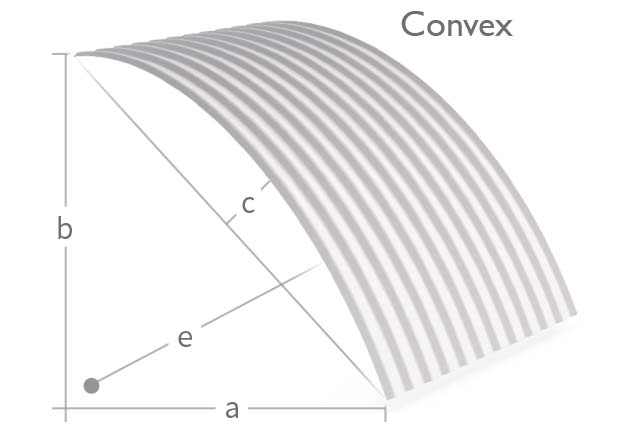
CGI Corrugated Curving sheet can be pre-curved by Stratco into a variety of forms to produce concave or convex curves, bullnose roofing, or barrel vaulting (a complete half circle), in either concave or convex arrangements.Image gallery

Curved Creations
Custom Made For Your Project
Pre-Curved sheeting allows for complex curved designs that complement both traditional homes and modern architecture. Factory pre-curved to your requirements in high quality CGI Curving sheet by Stratco in a variety of forms including concave, convex, bullnose and barrel vault designs.
Available Colours:
Brochures & Installation Guides
Preferred Ordering Method
Note: Curving of CGI will produce a minimum straight section at the end of the curve of at least 60mm. Stratco takes no responsibility for deformation that may occur from smaller radii. Contact Stratco for further curving specifications.
Supply of the profile template:
The template must be provided at time of ordering.
No responsibility will be accepted for sheets curved from drawings.
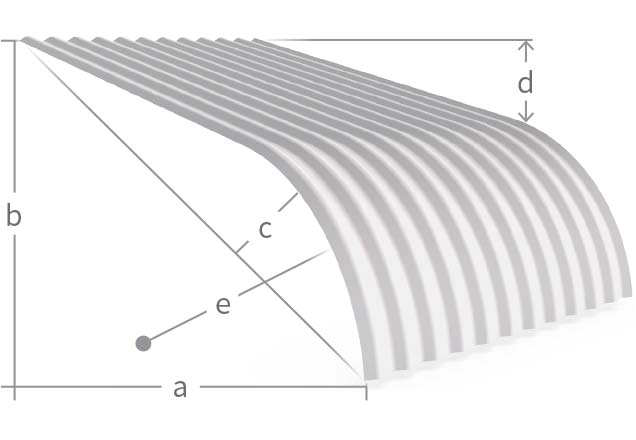
Ordering Information
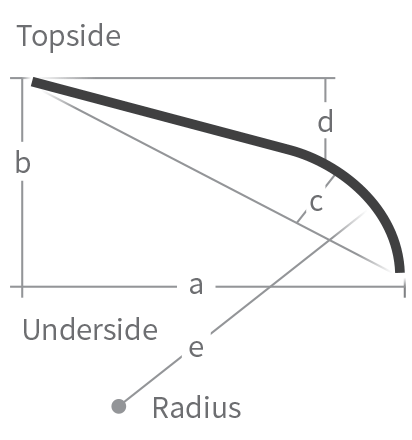
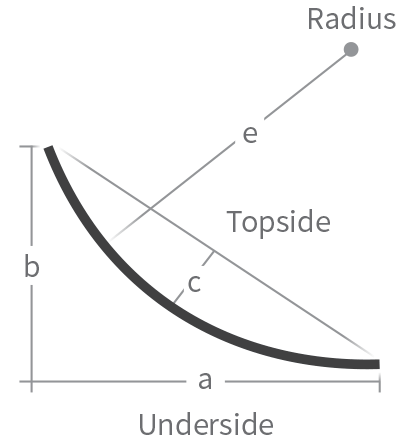
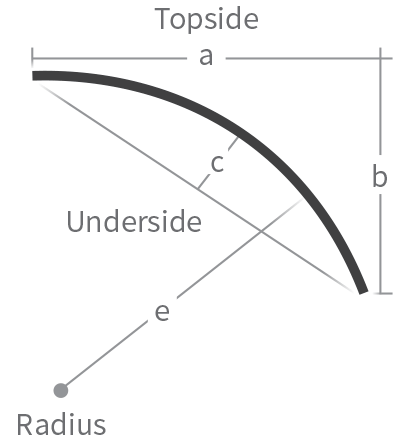
A - Distance from fascia front to wall.
B - Fascia height to wall attachment distance.
C - Required concave dip or convex rise.
D - Pitch angle from wall.
R - Radius required.
Additional Information Required
- Number of sheets required.
- Sheet lengths required.
- Type of curve.
- Direction of laying.
- Type of material.
- Colour topside or underside?
Bullnose Forming
Recommended minimum radius 400mm.
Maximum sheet length 6000mm.
Concave/Convex Forming
Recommended minimum radius 400mm.
Maximum sheet length 6000mm.
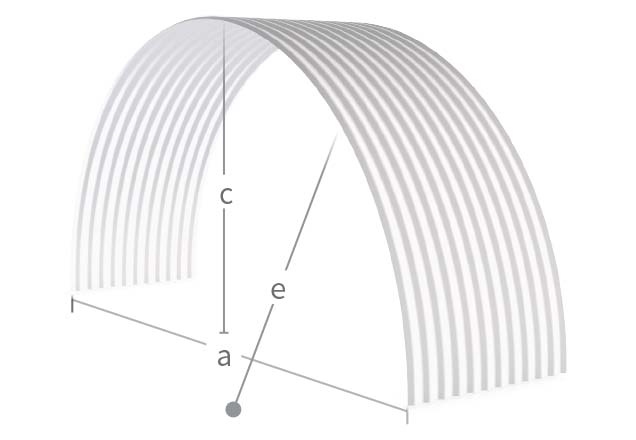
Barrel Vaulting
Recommended minimum radius 400mm.
Maximum sheet length 10,000mm.

Sheet Length and Curving Calculation Procedure
Bullnose Verandahs
Step 1
Dimensions Required:
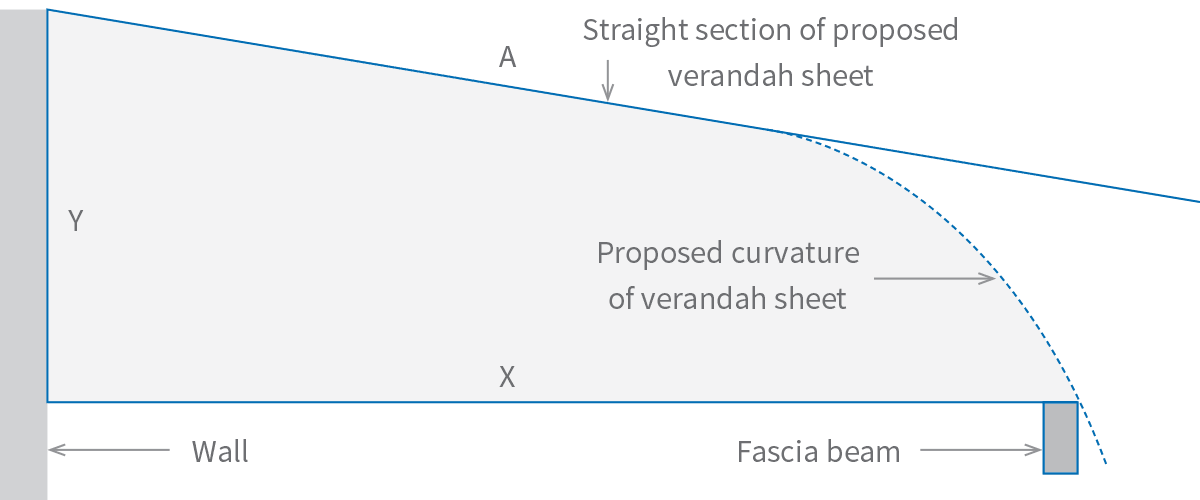
Width of Verandah - wall to outside face of fascia beam (X)
Height - top of fascia beam to underside of verandah sheet (Y)
Plot these lines to scale on graph paper.
Step 2
Draw the straight section of sheet (A) at the required fall.
Note: Corrugated iron is not recommended for a pitch of less than 5 degrees.
Step 3
Determine the radius of curvature:
Note: The recommended minimum radius for CGI curving is 400mm.
Stratco takes no responsibility for deformation that may occur from smaller radii.
Step 4
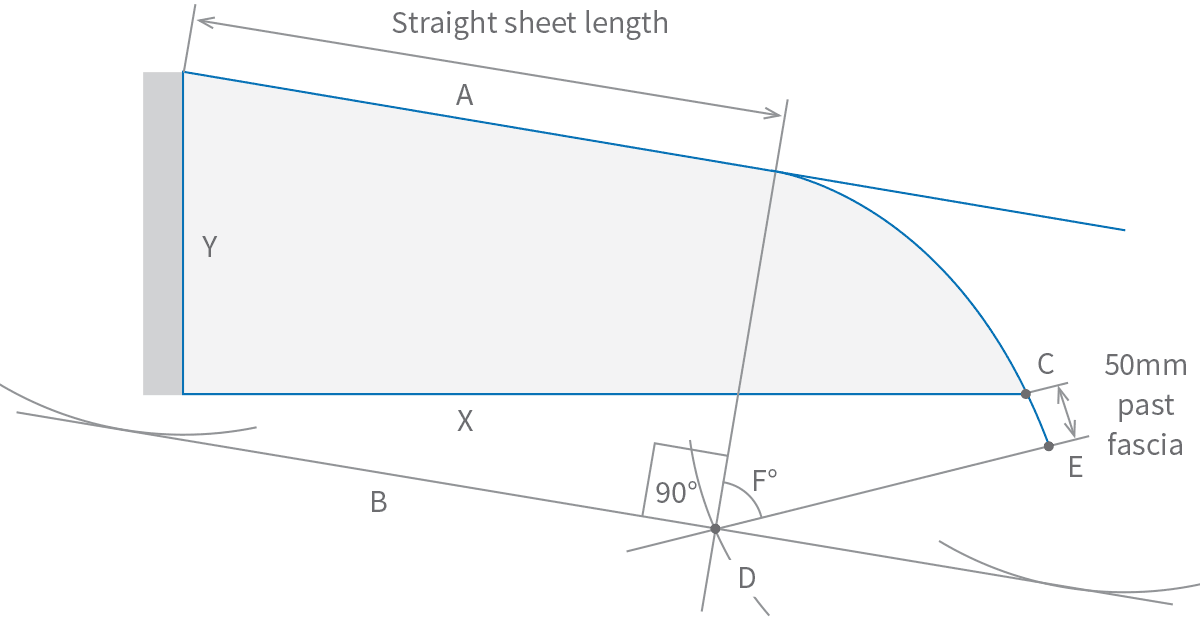
Set a compass to the radius of curvature and scribe arcs from both ends of line (A).
Connect arc tangents to form parallel line (B).
Set the compass point to the top front corner of the fascia Beam (C) and scribe an arc to intersect line B.
From this intersection (D) set the compass point and scribe an arc from line (A) to a point 50mm past the fascia (E).
Step 5
Calculating the roof sheet length:
- Extend a perpendicular line from point (D) to intersect line (A)
- Draw a line from point (D) to point (E)
- Measure the resulting angle (F°)
- Measure the length of straight sheet
- Calculate the length of curvature using the following formula:
2πr x angle (F°)
360
- Add the length of straight sheet to the curve length to determine the total sheet length
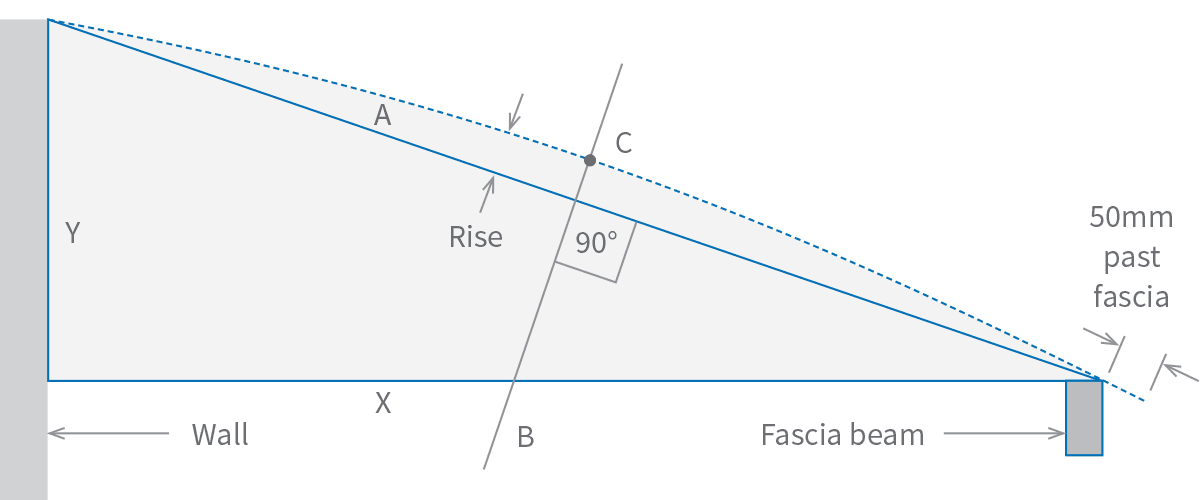
Concave and Convex Verandahs
Step 1
Dimensions Required:
Width of Verandah - wall to outside face of fascia beam (X)
Height - top of fascia beam to underside of verandah sheet (Y)
Plot these lines to scale on graph paper.
Step 2
Draw a straight line (A) between the wall and fascia beam as shown in below.
Locate the mid-point of line (A) and plot a perpendicular line (B) from this point.
Determine the required dip and plot the point of intersection (C) on line (B).
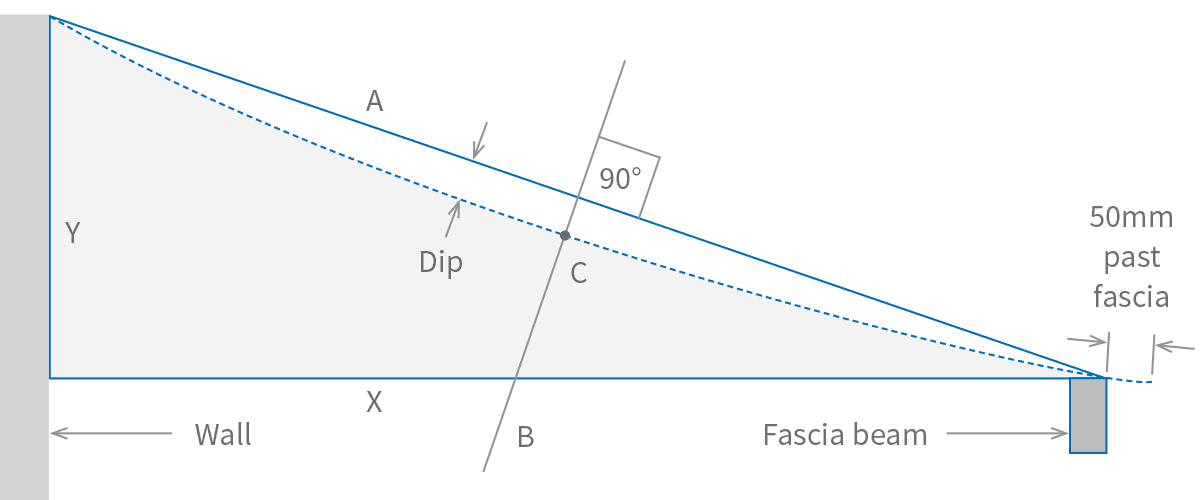
Step 3
Using a flexible scale ruler, join the top and bottom of line (A) through point (C).
Read the required sheet length from the scale ruler, allowing an additional 50mm past the fascia.
If required, adjust the dip to effectively suit the fall into the gutter.
Note: A minimum dip of 50mm is recommended for aesthetic reasons.
For convex verandahs repeat Step 1 to 3, however, plot the intersection point (C) on the opposite side of line (A) at the convex rise.
Preferred Ordering Method
Note: Curving of CGI will produce a minimum straight section at the end of the curve of at least 60mm.
Stratco takes no responsibility for deformation that may occur from smaller radii.
Please contact Stratco for further curving specifications.
Supply of the profile template:
The template must be provided at time of ordering.
No responsibility will be accepted for sheets curved from drawings.
Ordering Information
A - Distance from fascia front to wall.
B - fascia height to wall attachment distance.
C - Required concave dip or convex rise.
D - Pitch angle from wall.
R - Radius required.
Additional Information Required
- Number of sheets required.
- Sheet lengths required.
- Type of curve.
- Direction of laying.
- Type of material.
- Colour topside or underside?
![]()
